Pieter1989
Academy Player
- Joined
- Jan 18, 2021
- Messages
- 117
- Reaction score
- 135


How many vertices are in your model, and what dimension are your texture file, eg. 256*256, 1024*1024 etc.When I create a face my end size of Big file is 911kb I realize some of your faces is only 300kb what can I do to make file size smaller
Looking forward to hear from you
Hi Jim546 Dimensions on the texture is 512 x 512 where do I check the vertices in the modelHow many vertices are in your model, and what dimension are your texture file, eg. 256*256, 1024*1024 etc.
I also use 512*512 textures, the vertices should show at the bottom-right of Blender, here's one of mine as an example, the menu may be hidden for you but you can "drag up" from the bottom of the screen to show it:where do I check the vertices in the model

https://www.therugbyforum.com/threads/2022-23-kit-updates.48571/Guys can you please send me th latest international kits and maybe a newer roster please
The models should all use the same skeleton, you can copy/paste it from another project if you have one available or use the one I've uploaded below.Having a lot of problems with O'tools not exporting model with Skeleton my holding point at this stage to get finished faces into game

Thank you Jim546 appreciate will give it a goThe models should all use the same skeleton, you can copy/paste it from another project if you have one available or use the one I've uploaded below.
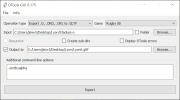
Edit: Just looked at your photos above of OTools, try turning off "Folder" mode on the input directory change the input to your .o file not its folder, for example:
View attachment 14313
Hi, did you ever get around with a "FIX" to this? I recently downloaded some faces and game does exactly the same - once zoomed in it shows face, zoomed out it goes orange...Hi Jim546
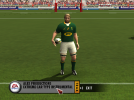
As per pictures below PS du Toit shows perfectly when Camera zoom in
View attachment 14158
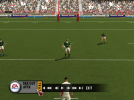
But when the camera zoom out or in game play you wil get this type of face
And i used the same file as per design tracker what i see is the larger files from 800 on ward seem to have this problem most of the 300 region files is fine
View attachment 14159
Hi, did you ever get around with a "FIX" to this? I recently downloaded some faces and game does exactly the same - once zoomed in it shows face, zoomed out it goes orange...
But when the camera zoom out or in game play you wil get this type of face
And i used the same file as per design tracker what i see is the larger files from 800 on ward seem to have this problem most of the 300 region files is fine
Tested it now with O.Farrel head and work perfect thank you x10000000Check what "Force LOD" is set to under the display options in your game. I've just replicated your errors by changing it to "Off". Switching LOD to "High" seems to fix it.
I think it's because the custom textures don't have any mipmaps with them. When you switch to low LOD the game sees the large base texture for the head and tries to load a lower res version instead, which it can't find hence the "no texture" error you get.
Thanks again, it worked after switching LOD to "High"Check what "Force LOD" is set to under the display options in your game. I've just replicated your errors by changing it to "Off". Switching LOD to "High" seems to fix it.
I think it's because the custom textures don't have any mipmaps with them. When you switch to low LOD the game sees the large base texture for the head and tries to load a lower res version instead, which it can't find hence the "no texture" error you get.
